Blinkies


Email Me
ladyaries_67@yahoo.com


Creative Teams
♥Proud Personal CT♥


Forums


I Support...

Thursday, September 4, 2014
Beautiful Autumn Cluster ~ Rieneke Designs CT
This kit is gorgeous! I had a fantastic time working with it. There is just so much that can be done with all of these beautiful elements. It is a must have kit and it can be purchased from Twilight Scraps.


*Click on the image to view full size*
Then right click to save to your computer.
Enjoy ♥
~ ~ ~ ~ ~ ~ ~ ~ ~ ~ ~ ~
Thanks so much Pammy for using this frame in your Cluster challenge at Bag A Snag.
Your tag is so gorgeous!! I love it! ♥
CT Tag Show Off ~ Rieneke Designs
Here is my CT tag that I made for Rieneke with her gorgeous kit
"Beautiful Autumn". It can be purchased from Twilight Scraps.
This kit is fantastic to work with and there is so much that can be done with it. I
have used artwork of VeryMany. You can purchase this beautiful tube from VeryMany Tubes. You must have a license to use.
*click on image to view full size*
*click on image to view full size*


Tuesday, September 2, 2014
A Moment In Time - PTU

*Click tag to see full size*
This tutorial is from my own imagination,
any similarity to any other tag or tutorial is purely coincidental.
It was written by LadyAries on September 2nd, 2014.
This tut was written for those with a basic knowledge of psp.
*Supplies Needed*
PSP: I am using X2 but any version should work.
Font of choice: I am using Sverige Script Decorated Demo
Template: Millie's PSP Madness 647 HERE
Drop Shadow usually V3 H3 O25 B5 black
*Tube of Choice*
I am using the beautiful art of Arthur Crowe.
And it can be purchased from Arthur Crowes Factory.
This tutorial is from my own imagination,
any similarity to any other tag or tutorial is purely coincidental.
It was written by LadyAries on September 2nd, 2014.
This tut was written for those with a basic knowledge of psp.
*Supplies Needed*
PSP: I am using X2 but any version should work.
Font of choice: I am using Sverige Script Decorated Demo
Template: Millie's PSP Madness 647 HERE
Drop Shadow usually V3 H3 O25 B5 black
*Tube of Choice*
I am using the beautiful art of Arthur Crowe.
And it can be purchased from Arthur Crowes Factory.
This is a PTU tube and you must have a license to use.
*Scrap kit Of Choice*
I am using the beautiful PTU kit "Moment In Time" by Devilish Dezines.
And it can be purchased from Pics For Design
*PlugIns*
*Scrap kit Of Choice*
I am using the beautiful PTU kit "Moment In Time" by Devilish Dezines.
And it can be purchased from Pics For Design
*PlugIns*
Eye Candy 6, Gradient glow for the name.
~ ~ ~ ~ ~ ~ ~ ~ ~ ~
*Let's Get Started*
*Remember to add your drop shadow as you go along*
Open template, Shift D to duplicate then close original & delete credits.
1.
Select all/float/defloat new raster layer. Open paper6 and resize 60 percent, copy & paste into selection move it around till you have it where you want it, selection invert, delete, select none & delete original template layer.
2.
Select all/float/defloat new raster layer. Open element16, copy & paste into selection move it around till you have it where you want it, selection invert, delete, select none & delete original template layer.
3.
Select all/float/defloat new raster layer. Open paper4 and resize 55 percent, copy & paste into selection move it around till you have it where you want it, selection invert, delete, select none & delete original template layer.
4.
Repeat step 3 on this layer.
5.
Select all/float/defloat new raster layer. Open element35 and resize 90 percent, copy & paste into selection move it around till you have it where you want it, selection invert, delete, select none & delete original template layer.
Still working on your circle layer, Select all/float/defloat new raster layer. Mirror your tube, Copy & paste your tube into selection move it around till you have it where you want it, selection invert, delete, select none.
Now for your tube layer go up to Adjust, Hue and Saturation, Colorize and use these settings below.

All I did to this layer was add my drop shadow.
Resize tube 55 percent, copy & paste to the left side of your tag.
Time to add the elements, I used the following:
Element42 resize to 34 percent, copy & paste to the right of your tag.
Element34 resize to 24 percent, copy & paste to the right of your tag.
Element34 resize to 24 percent, copy & paste to the right of your tag.
Element26 resize 65 percent, copy & paste to the bottom of your tag. Duplicate & mirror.
Element25 resize to 50 percent, copy & paste to the right of your tag. Duplicate & mirror.
Element27 resize to 16 percent, copy & paste to the right of your tag.
Element8 resize 35 percent, copy & paste to the bottom of your tag. Duplicate & mirror.
Element16 resize to 88 percent, copy & paste to the right of your tag. Now send this to the bottom of your layers palette. Duplicate & mirror.
See my tag for details.
Element16 resize to 88 percent, copy & paste to the right of your tag. Now send this to the bottom of your layers palette. Duplicate & mirror.
See my tag for details.
Add more elements if you wish to.
When you are happy with your tag merge all layers and resize to your liking.
Apply the correct artist copyright and license info and save as a PNG, then add your name and merge & save.
I hope you enjoyed this tut.♥
Friday, August 29, 2014
CT Tag Show Off ~ Rieneke Designs
CT tag that I made for Rieneke with her beautiful kit
"Those Days". It can be purchased from Twilight Scraps. I
have used artwork of Myka Jelina. You can purchase art from her store Myka's Graphics. You must have a license to use.
*click on image to view full size*
*click on image to view full size*


Sunday, August 17, 2014
Glad There Is You - No Scrap


*Click tag to see full size*
This tutorial is from my own imagination,
any similarity to any other tag or tutorial is purely coincidental.
It was written by LadyAries on August 17th, 2014.
*Supplies Needed*
PSP: I am using X2 but any version should work.
Background: Allison's Addictions, ForumSet Background40 HERE
This tutorial is from my own imagination,
any similarity to any other tag or tutorial is purely coincidental.
It was written by LadyAries on August 17th, 2014.
*Supplies Needed*
PSP: I am using X2 but any version should work.
Background: Allison's Addictions, ForumSet Background40 HERE
Font of choice: I am using P22 Corinthia
Word art: Quotes by Simone HERE
*Tube of Choice*
I am using the adorable art of Lisa Victoria.
Word art: Quotes by Simone HERE
*Tube of Choice*
I am using the adorable art of Lisa Victoria.
And it can be purchased from The PSP Project.
This is a PTU tube and you must have a license to use.
~ ~ ~ ~ ~ ~ ~ ~ ~ ~
*Let's Get Started*
*Remember to add your drop shadow as you go along*
I am using V3 H3 O25 B5 black.
*Remember to add your drop shadow as you go along*
I am using V3 H3 O25 B5 black.
Open a new image 600 x 250
Copy & paste the background into your tag.
Resize your tube 50 percent, copy & paste it to the right side of your tag.
Resize word art 75 percent, copy & paste to the left side of your tag.
Merge visible, Selections, Select All, Modify, Select Selections Borders with these settings.

Now over in your layers palette set your foreground to #007192 and your background to #46d7a3 and set up your gradient with these settings.

Do not deselect yet. Now flood fill your border with your gradient. Click on Adjust, Add/remove noise, Add noise with these settings.

Now click on Effects, 3D effects, Inner bevel with these settings.

Selections, select none.
When you are happy with your tag merge all layers
Apply the correct artist copyright and license info and save as a PNG.
Avatar
Open new image 150 x 150
Copy & paste the background into your tag.
Avatar
Open new image 150 x 150
Copy & paste the background into your tag.
Resize your tube 35 percent - mirror, copy & paste it to the left side of your tag.
Merge visible and repeat steps from above for your boarder, gradient, noise and inner bevel.
Apply the correct artist copyright and license info and save as a PNG.
Now add your name and merge & save.
I hope you enjoyed this tut.♥
I hope you enjoyed this tut.♥
Saturday, August 16, 2014
Garden Of Fantasy FB Cover Set
I had such wonderful comments on the forum set that I made matching this that I decided to create a snaggable FB cover set as well. I have used the beautiful artwork of Myka Jelina and a gorgeous scrap kit by Rieneke Designs & Joy Designs
Enjoy ♥
*click on image to view full size*
*click on image to view full size*

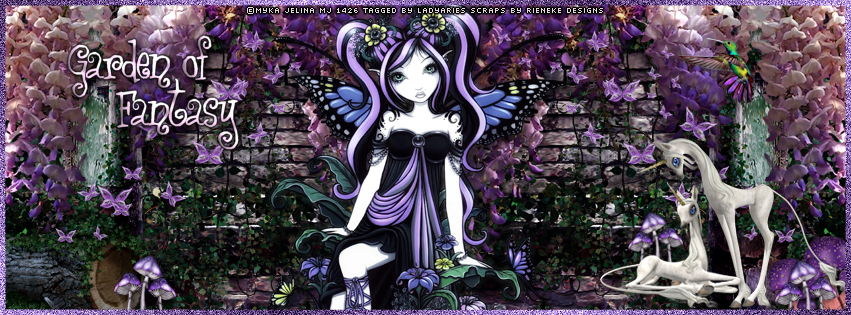
**Do Not Add Names To My Snags & Do No Alter In Any Way**
Please note that with Facebooks's TOU you can not use a artists full url on timeline covers.
Please only use this for facebook as that is what the credits is set for.
Please note that with Facebooks's TOU you can not use a artists full url on timeline covers.
Please only use this for facebook as that is what the credits is set for.
Thank You!
Thursday, August 14, 2014
Huggable Cluster ~ Rieneke Designs CT
This is such a gorgeous kit and there is so much that can be done with it. It is just full of the most lovely elements you will love. I had a great time working with it. It can be purchased from Twilight Scraps.


Then right click to save to
Enjoy ♥
Subscribe to:
Posts
(Atom)
Copyright Compliant Award

♥Blogs I Love


♥Stores I Love


