Blinkies


Email Me
ladyaries_67@yahoo.com


Creative Teams
♥Proud Personal CT♥


Forums


I Support...

Friday, January 16, 2015
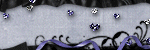
CT Tag Show Off ~ Joy Designs
Here is my CT tag that I made for Joy with her beautiful kit "I Love You". It can be purchased from Smiley Creations Shop and Twilight Scraps. I have also used a beautiful tube of Zlata_M. You can purchase this art from Zlata_M Art Shop. You must have a license to use.
*click on image to view full size*


Thursday, January 15, 2015
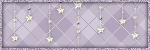
New Years Wish - PTU

*Click tag to view full size*
This tutorial is from my own imagination,
any similarity to any other tag or tutorial is purely coincidental.
It was written by LadyAries on January 15th, 2015.
This tut was written for those with a basic knowledge of psp.
*Supplies Needed*
PSP: I am using X2 but any version should work.
Font of choice: I am using Happy New One
PlugIns: Eye Candy 6, Gradient glow for the name.
*Scrap kit Of Choice*
I am using the fantastic PTU kit "New Year Fairy" by Devilish Dezines.
And it can be purchased from Scraps N Company
*Tube of Choice*
I am using the beautiful art of The Hunter.
And it can be purchased from Scraps N Company
This is a PTU tube and you must have a license to use.
~ ~ ~ ~ ~ ~ ~ ~ ~ ~
*Let's Get Started*
*Remember to add your drop shadow as you go along*
I am using V3 H3 O25 B5 black
Open a new image 650 x 650
Element9 resize 90 percent, copy & paste to the center of your tag. Adjust, Sharpness, sharpen one time. Duplicate & mirror.
Frame3 resize 74 percent, copy & paste to the center of your tag.
Activate your magic wand and click inside your frame layer, Selections modify expand by 6.
Copy & paste Paper6, Selections, invert and then click delete. Over in your layers palette drag this layer under your frame.
Resize tube to your liking and copy & paste under your frame layer. Use your eraser tool to remove the excess parts that are hanging out of your frame.
Frame2 resize 78 percent, copy & paste to the center of your tag. Do not drop shadow this layer. Adjust, Sharpness, sharpen one time.
Element13 resize 38 percent, copy & paste to the bottom of your tag. Add your drop shadow, Adjust, Sharpness, sharpen one time. Duplicate twice.
Element38 resize 40 percent, copy & paste to the right side of your tag. Adjust, Sharpness, sharpen one time.
Element24 resize 48 percent, copy & paste to the right side of your tag.
Element50 resize 20 percent, copy & paste to the right side of your tag.
Element28 resize 22 percent, copy & paste to the right side of your tag.
Element24 resize 48 percent, copy & paste to the right side of your tag.
Element50 resize 20 percent, copy & paste to the right side of your tag.
Element28 resize 22 percent, copy & paste to the right side of your tag.
Element43 resize 23 percent, copy & paste to the right side of your tag.
Element16 resize 20 percent, copy & paste to the right side of your tag.
See my tag for details.
See my tag for details.
Add more elements if you wish to.
When you are happy with your tag merge all layers and resize to your liking.
When you are happy with your tag merge all layers and resize to your liking.
Apply the correct artist copyright and license info and save as a PNG, then add your name and merge & save.
I hope you enjoyed this tut. ♥

Tuesday, January 13, 2015
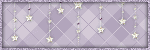
CT Tag Show Off ~ FwTags Creations
Here is my CT tag that I made for Claire with her beautiful kit "Winter Valentine". And it can be purchased from any of her stores HERE. And I have used artwork of Zindy S. D. Nielsen. You can purchase her art from Zindy Zone Shop. You must have a license to use.
*click on image to view full size*


Friday, January 9, 2015
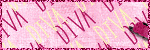
Sexy And I Know It - PTU

*Click tag to view full size*
This tutorial is from my own imagination,
any similarity to any other tag or tutorial is purely coincidental.
This tutorial was written by LadyAries on January 9th, 2015.
This tut was written for those with a basic knowledge of psp.
*Supplies Needed*
PSP: I am using X2 but any version should work.
Font of choice: I am using Vivaldi
Mask: HorsePlay's Pasture Mask2 HERE
Template: Millie's PSP Madness 647 HERE
PlugIn: Eye Candy 6, Gradient glow for the name.
*Scrap kit Of Choice*
I am using the beautiful PTU kit "Elegant Party" by Devilish Dezines.
And it can be purchased from Scraps N Company
*Tube of Choice*
I am using the beautiful art of Jose Cano.
You can purchase his artwork from his store Cano Tubes.
However this tube is no long available.
This was a PTU tube and you must have a license to use.
~ ~ ~ ~ ~ ~ ~ ~ ~ ~
*Let's Get Started*
*Remember to add your drop shadow as you go along*
I am using V3 H3 O25 B5 black
Open template, Shift D to duplicate then close original & delete credits.
1
Select all/float/defloat new raster layer. Open paper3 and copy & paste into selection, selection invert, delete, select none & delete original template layer.
2
Select all/float/defloat new raster layer open paper6 and copy & paste into selection, selection invert, delete, select none & delete original template layer.
3
Delete this layer
4
Select all/float/defloat new raster layer open paper4 and copy & paste into selection, selection invert, delete, select none & delete original template layer.
5
Select all/float/defloat new raster layer open paper5 and copy & paste into selection, move it around to where you have it where you want it and then selection invert, delete, select none & delete original template layer.
6
Just add your drop shadow to this layer.
Time to add the elements,
I have used the following:
Element8 resize to 38 percent, copy & paste to the center of your circle layer.
Element43 resize to 22 percent, copy & paste to the right side of your tag. Duplicate & mirror. Paste once more on the left side of your tag then duplicate & mirror. See my tag for details.
Element17 resize to 26 percent, copy & paste to the left side of your tag. Duplicate & mirror then move it over slightly to the right so that it is sitting nicely on the dark grey leaves.
Resize your tube to your liking and copy & paste to the center of your tag.
Element40 resize to 16 percent-flip, copy & paste to the right side of your tag Duplicate & mirror
Element44 resize to 20 percent, copy & paste to the left side of your tag. Duplicate & mirror then move it over slightly to the right so that it is sitting nicely on the flowers element.
See my tag for details.
Add more elements if you wish to.
Merge your tag visible and move it to where it is sitting nicely in the center of your work space and then add Element7 resize to 60 percent, copy & paste to the left side of your tag. Now send it to the bottom of your layers palette, duplicate & mirror.
Open new raster layer and send to the bottom, copy & paste paper6 and apply your mask.
When your happy with your tag merge all layers and resize to your liking.
Apply the correct artist copyright and license info and save as a PNG, then add your name and merge & save.
I hope you enjoyed this tut. ♥

Tuesday, January 6, 2015
CT Tag Show Off ~ Joy Designs
Here is my first CT tag that I made for Joy with her beautiful kit "King Of My Heart". I decided to make a Facebook cover set with this kit. Kit can be purchased from Smiley Creations Shop and Twilight Scraps. I have also used a beautiful tube of Enamorte. You can purchase Enamorte art from Creative Design Outlet.
You must have a license to use.
*click on image to view full size*


Exciting News!!
I am so excited and just had to come and share my news I received this morning.
I have been excepted into the CT team of Joy Designs!!
Your kits are gorgeous and I am really looking forward to working with them.
Thank you so very much for giving me this chance!
Friday, January 2, 2015
CT Tag Show Off ~ Rieneke Designs
Here is my CT tag that I made for Rieneke with this gorgeous kit "December Magic". It can be purchased from Twilight Scraps. I have also used a beautiful tube of VeryMany. You can purchase this art from VeryMany Tubes. You must have a license to use.
*click on image to view full size*


Subscribe to:
Posts
(Atom)
Copyright Compliant Award

♥Blogs I Love


♥Stores I Love