Blinkies


Email Me
ladyaries_67@yahoo.com


Creative Teams
♥Proud Personal CT♥


Forums


I Support...

Wednesday, September 25, 2013
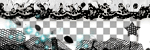
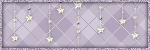
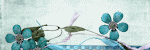
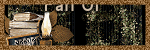
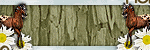
Happy Autumn Snags
I liked this tag so well after writing the tut that I decided to share some snags of it.
I made this snag set with artwork of Joel Adams which can be purchased from Creative Design Outlet. The scrap kit I used is a PTU kit by HorsePlay's Pasture, "Autumn Sunset" which can be purchased from any of her stores HERE
*click on image to view full size & right click to save*
Enjoy ♥ 


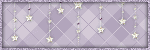
Happy Autumn - FTU

*Click tag to see full size*
This tutorial is from my own imagination,
any similarity to any other tag or tutorial is purely coincidental.
This tutorial was written by LadyAries on September 25th, 2013.
This tut was written for those with a basic knowledge of psp.
*Supplies Needed*
PSP: I am using X2 but any of them should work.
Font of choice, I am using Yataghan
Template: Millie's PSPMadness255 HERE
Mask: HorsePlay's Pasture Mask27 HERE
Be sure to place your mask into your mask folder.
Drop Shadow usually V3 H3 O25 B5 black
*Tube of Choice*
I am using the lovely art of Joel Adams.
And it can be purchased HERE
This is a PTU tube and you must have a license to use.
*Scrap kit Of Choice*
I am using the beautiful PTU kit "Autumn Sunset" by HorsePlay's Pasture.
~Updated Sept. 7th, 2014 this PTU kit is now FTU HERE
*PlugIns*
Eye Candy 6, Gradient glow for the name.
~ ~ ~ ~ ~ ~ ~ ~ ~ ~
~ ~ ~ ~ ~ ~ ~ ~ ~ ~
*Let's Get Started*
*Remember to add your drop shadow as you go along*
Open template, Shift + D and close original. Delete credits & layers 8 and 9.
Reset canvas size to 700 by 600 to give you more working room.
Open template, Shift + D and close original. Delete credits & layers 8 and 9.
Reset canvas size to 700 by 600 to give you more working room.
1
Select all/float/defloat new raster layer. Open paper5 and copy
& paste, selection invert, delete, select none & delete
original template layer.
2
2
Select all/float/defloat new raster layer. Open paper9 and copy
& paste, selection invert, delete, select none & delete
original template layer.
3
Repeat steps 2 again on this layer.
4
Select all/float/defloat new raster layer. Open paper14 and copy & paste, selection invert, delete, select none & delete original template layer.
5
Repeat steps 4 again on this layer.
6
Select all/float/defloat new raster layer. Open paper3 and copy & paste, selection invert, delete, select none & delete original template layer.
7
Simply add a drop shadow to this layer and then duplicate so it will show up more.
Add your tube, resize 90 percent - mirror, & place in the center of your tag.
Time to add the elements, I used the following:
Element19 copy & paste to the bottom right side of your tag.
Element80 copy & paste to the bottom right side of your tag.
Element80 again resize 60 percent, copy & paste to the bottom right side of your tag.
Element40 resize 75 percent & copy & paste to the left side of your tag.
Element64 copy & paste to the bottom right side of your tag.
Element52 resize 30 percent & copy & paste to the right side of your tag.
Element74 resize 40 percent & copy & paste to the right side of your tag.
Element74 resize 30 percent - mirror & copy & paste to the right side of your tag.
Element22 resize 40 percent - mirror & copy & paste to the left side of your tag.
Element53 resize 22 percent & copy & paste to the right side of your tag, duplicate & mirror.
Drag the one on the left to just under the elephants.
Element36 resize 25 percent - mirror & copy & paste to the right side of your tag.
Element35 resize 22 percent - mirror & copy & paste to the right side of your tag.
Element35 resize 17 percent - mirror & copy & paste to the left side of your tag.
Element36 resize 22 percent - mirror & copy & paste to the right side of your tag.
See my tag for details.
Add more elements if you wish to.
Open new raster layer and send to the bottom, flood fill with color of choice and apply your mask.
When you are happy with your tag merge all layers and resize to your liking.
Apply the correct artist copyright and license info and save as a PNG, then add your name and merge & save.
I hope you enjoyed this tut. ♥
Tuesday, September 17, 2013
It's All About Autumn - PTU

*Click tag to see full size*
This tutorial is from my own imagination,
any similarity to any other tag or tutorial is purely coincidental.
This tutorial was written by LadyAries on September 17th, 2013.
This tut was written for those with a basic knowledge of psp.
*Supplies Needed*
PSP: I am using X2 but any of them should work.
Font of choice, I am using Brock Script
Template: 314 by Millie's PSP Madness HERE
Drop Shadow usually V3 H3 O25 B5 black
*Tube of Choice*
I am using the lovely art of Eugene Rzhevskii.
This tube is however a Quest that you receive when you purchase so many tubes from HERE.
This tube is however a Quest that you receive when you purchase so many tubes from HERE.
This is a PTU tube and you must have a license to use.
*Scrap kit Of Choice*
I am using the gorgeous PTU kit "Autumn Is Almost Here" by Sassi Designs.
And it can be found at any of her stores HERE.
*PlugIns*
Eye Candy 6, Gradient glow for the name.
~ ~ ~ ~ ~ ~ ~ ~ ~ ~
~ ~ ~ ~ ~ ~ ~ ~ ~ ~
*Let's Get Started*
*Remember to add your drop shadow as you go along*
Open template, Shift + D and close original & delete credits layer.
This will be so easy to work with since Millie has her layers numbered on the template.
Open template, Shift + D and close original & delete credits layer.
This will be so easy to work with since Millie has her layers numbered on the template.
1
Select all/float/defloat new raster layer. Open paper20 and copy & paste, selection invert, delete, select none & delete
original template layer.
.
.
2
Select all/float/defloat new raster layer. Open paper4 and copy & paste, selection invert, delete, select none & delete original template layer.
Select all/float/defloat new raster layer. Open paper4 and copy & paste, selection invert, delete, select none & delete original template layer.
3
Select all/float/defloat new raster layer. Open paper15 and copy & paste, selection invert, delete, select none & delete original template layer.
Select all/float/defloat new raster layer. Open paper15 and copy & paste, selection invert, delete, select none & delete original template layer.
4
Select all/float/defloat new raster layer. Open paper37 and copy & paste, selection invert, delete, select none & delete original template layer.
Select all/float/defloat new raster layer. Open paper37 and copy & paste, selection invert, delete, select none & delete original template layer.
5, 6 & 7
Simply add a drop shadow to these layers.
Simply add a drop shadow to these layers.
8, 9 & 10
Simply add a drop shadow to these layers and then duplicate them so they will show up more.
11
Add the drop shadow twice to this layer.
Add your tube, resize 40 percent, place to the left side of your tag & mirror.
.
.
Time to add the elements, I used the following:
Element 141 copy & paste to the bottom of your template, duplicate & flip.
Element 142 resize 65 percent, copy & paste to the bottom right side and then mirror.
Element 118 resize 38 percent, copy & paste to the bottom left corner.
Element 108 resize 40 percent, copy & paste to the top of layer 6.
Element 2 resize 50 percent, mirror - copy & paste to the right side.
Element 81 resize 60 percent, copy & paste to the right side, duplicate then bring one over to the center of your tag.
Element 123 resize 20 percent, copy & paste to the right side, duplicate & mirror.
See my tag for details.
Add more elements if you wish to.
When you are happy with your tag merge all layers and resize to your liking.
Apply the correct artist copyright and license info and save as a PNG, then add your name and merge & save.
I hope you enjoyed this tut. ♥
Sunday, September 15, 2013
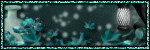
Come Hallows Eve - FTU

*Click tag to see full size*
This tutorial is from my own imagination,
any similarity to any other tag or tutorial is purely coincidental.
This tutorial was written by LadyAries on September 15th, 2013.
This tut was written for those with a basic knowledge of psp.
*Supplies Needed*
PSP: I am using X2 but any of them should work.
Font of choice, I am using AkaDora
Mask: WSL 84 HERE.
Drop Shadow usually V3 H3 O25 B5 black
*Tube of Choice*
I am using the lovely art of Eugene Rzhevskii.
This tube is however a exclusive and is only available in the Exclusive Club HERE.
This is a PTU tube and you must have a license to use.
*Scrap kit Of Choice*
I am using the fantastic PTU kit "Halloween Magic" by HorsePlay's Pasture.
~Updated Sept. 7th, 2014 this PTU kit is now FTU HERE
*PlugIns*
Eye Candy 6, Gradient glow for the name
~ ~ ~ ~ ~ ~ ~ ~ ~ ~
*Let's Get Started*
*Remember to add your drop shadow as you go along*
Open a new image 650 x 650
Element 66 resize 95 percent, copy and paste to your blank image.
Element 66 once again and copy and paste to your tag, this will give you a nice looking double frame to work with.
Activate your magic wand and click inside the frame of raster layer 2, selections, modify, expand by 8. Open a new raster layer, copy & paste paper 8, selections, invert, delete, selections none.
Element 21 resize 50 percent, copy & paste to the left side of your frame.
Copy & paste element 17 into the center of raster 2.
Element 75 resize 30 percent, copy & paste to the upper left corner of the web.
Add your tube & resize 90 percent, place in the center of your frames.
Take your eraser tool and erase the parts of the tube sticking out from the frame.
Element 50 resize 70 percent, copy & paste to the top of your frame.
Element 36 resize 35 percent, copy & paste to the top of your frame.
Element 21 resize 50 percent, copy & paste to the right side behind your frame.
Element 8 resize 25 percent, copy & paste to the bottom of your frame, duplicate & mirror.
Element 10 resize 28 percent, copy & paste to the bottom of your frame.
See my tag for details.
Add more elements if you wish to.
Open new raster layer and send to the bottom, flood fill with color of choice and apply your mask. Duplicate & mirror then merge down, duplicate & flip.
When you are happy with your tag merge all layers and resize to your liking.
Apply the correct artist copyright and license info and save as a PNG, then add your name and merge & save.
I hope you enjoyed this tut. ♥
Friday, September 13, 2013
Exciting News
I just had to come and share my awesome news with everyone.
I have been excepted into the CT team of HorsePlay's Pasture!!!
I am so thrilled to be working with Beverly and the rest of her team.
Thanks so much Beverly for giving me this chance!
I am so thrilled to be working with Beverly and the rest of her team.
Thanks so much Beverly for giving me this chance!
Your kits are fantastic and I am really looking forward to working with them.
You can view Beverly's kits and find the links to her stores HERE.
You can view Beverly's kits and find the links to her stores HERE.
Thursday, September 12, 2013
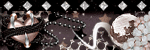
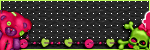
CT Tag Show Off
Here is my second CT tag that I made for Sassi with this fantastic kit
"SteamPunk Girl". See a listing of her stores HERE. And I used artwork of Angelica S. You can purchase
her art from Scraps and the City. You must have a license to use her art.
*click on image to view full size*


Tuesday, September 10, 2013
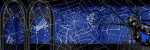
Autumn Glory - PTU

*Click tag to see full size*
This tutorial is from my own imagination,
any similarity to any other tag or tutorial is purely coincidental.
This tutorial was written by LadyAries on September 10th, 2013.
This tut was written for those with a basic knowledge of psp.
*Supplies Needed*
PSP: I am using X2 but any of them should work.
Font of choice, I am using Ziggy Zoe
Template: TracyF.Designz-AutumnTemplate7 HERE
Mask: Pimpin Pspers Fall Mask, KARmask003 HERE
Drop Shadow usually V2 H2 O25 B5 black
*Tube of Choice*
I am using the lovely art of VeryMany.
And it can be purchased HERE.
This is a PTU tube and you must have a license to use.
*Scrap kit Of Choice*
I am using the beautiful PTU kit "Shadowy Fall" by Devilish Dezines.
And it can be purchased HERE.
~ ~ ~ ~ ~ ~ ~ ~ ~ ~
*Let's Get Started*
*Remember to add your drop shadow as you go along*
Open template, duplicate and close original & delete credits.
Resize Canvas size to 650 by 600, this will give you a little more room to work with.
Circle
Select all/float/defloat new raster layer. Open paper6 and resize 70 percent copy & paste into selection move it around till you have it where you want it, selection invert, delete, select none & delete original template layer.
Rectangle
Select all/float/defloat new raster layer. Open paper6 and resize 65 percent copy & paste into selection move it around till you have it where you want it, selection invert, delete, select none & delete original template layer.
Strip1
Select all/float/defloat new raster layer open paper5 copy & paste into selection, selection invert, delete, select none & delete original template layer.
Add your tube, resize 40 percent, place to the right side of your tag.
Time to add the elements, I used the following:
Element 91 resize 50 percent, duplicate & mirror.
Element 46 resize 25 percent.
Element 49 resize 65 percent, mirror and place on the left side behind your template.
Element 21 resize 15 percent.
Element 89 resize 25 percent.
Element 42 resize 30 percent, duplicate & mirror.
Element 92 resize 15 percent, add to the right side of the barrel.
Element 92 resize 10 percent, add to the left side of the barrel.
Element 60 resize 15 percent.
Element 60 resize 12 percent.
See my tag for details.
Add more elements if you wish to.
Open new raster layer and send to the bottom, copy & paste paper6 and apply your mask.
When your happy with your tag merge all layers and resize to your liking.
Apply the correct artist copyright and license info and save as a PNG, then add your name and merge & save.
I hope you enjoyed this tut. ♥
~ ~ ~ ~ ~ ~ ~ ~ ~ ~ ~ ~
My dear sweet friend sandy from ACDiva forum has tried my tut. Yay
This is her beautiful tag. Thanks so very much sandy!! ♥

~ ~ ~ ~ ~ ~ ~ ~ ~ ~ ~ ~
My dear sweet friend sandy from ACDiva forum has tried my tut. Yay
This is her beautiful tag. Thanks so very much sandy!! ♥

Sunday, September 8, 2013
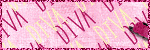
CT Tag Show Off
Here is my first CT tag that I made for Sassi with this fantastic kit
"SteamPunk Girl". See a listing of her stores HERE. And I used artwork of Arthur Crowe. You can purchase
his art from his store Arthur Crowes Factory.
You must have a license to use his art.
*click on image to view full size*


Exciting News
I just had to come and share my exciting news with everyone.
OMG I have been invited to guest ct for the creative team for Devilish Dezines!!!
I was just thrilled to be invited to join them for the next 3 months.
Thank you so very much Sheila for giving me this chance!
I was just thrilled to be invited to join them for the next 3 months.
Thank you so very much Sheila for giving me this chance!
Your kits are so awesome and I am really looking forward to working with them.
Friday, September 6, 2013
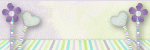
Autumn Magic FB Cover Set
Found myself in a tagging mood tonight and I
created a snaggable FB cover set. I used the adorable artwork of sumeragisama which can be purchased at Pics For Design and a beautiful little scrap kit called "Fall Magic Fairies" by Design By Joan, this kit is no longer available.
Enjoy ♥
*click on image to view full size*


**Do Not Add Names To My Snags & Do No Alter In Any Way**
Please note that with Facebooks's TOU you can not use a artists full url on timeline covers.
Please note that with Facebooks's TOU you can not use a artists full url on timeline covers.
Please only use this for facebook as that is what the credits is set for.
Thank You!
Tuesday, September 3, 2013
Fairy Delight - PTU

*Click tag to see full size*
This tutorial is from my own imagination,
any similarity to any other tag or tutorial is purely coincidental.
This tutorial was written by LadyAries on September 3rd, 2013.
This tut was written for those with a basic knowledge of psp.
This tutorial is from my own imagination,
any similarity to any other tag or tutorial is purely coincidental.
This tutorial was written by LadyAries on September 3rd, 2013.
This tut was written for those with a basic knowledge of psp.
*Supplies Needed*
PSP: I am using X2 but any of them should work.
Font of choice, I am using Xiomara
Template: AquaRebel315 Template 66 HERE
Mask: PunkyButts Pbs 6, HERE
Be sure to place your mask into your mask folder.
Drop Shadow usually V2 H2 O25 B5 black
*Tube of Choice*
I am using the lovely art of Caron Vinson
And it can be purchased HERE
This is a PTU tube and you must have a license to use.
*Scrap kit Of Choice*
I am using the beautiful PTU kit "My Summer Garden" by SassiDesigns.
And it can be found at any of her stores HERE
~ ~ ~ ~ ~ ~ ~ ~ ~ ~ ~ ~
*Let's Get Started*
*Remember to add your drop shadow as you go along*
Open template, duplicate close original & delete credits, delete word art, glitter backing.
Grad Circle
Select all/float/defloat new raster layer open paper 37 copy & paste into selection, selection invert, delete, select none & delete original template layer.
White Circle
Add noise Uniform/45/Monochrome Checked, sharpen and add drop shadow.
Pink Circle
Select all/float/defloat new raster layer open paper 13 copy & paste into selection, selection invert, delete, select none & delete original template layer.
Grad Rectangle 1
Select all/float/defloat new raster layer open paper 36 copy & paste into selection, selection invert, delete, select none & delete original template layer.
Grad Rectangle 2
Select all/float/defloat new raster layer open paper 36 copy & paste into selection, selection invert, delete, select none & delete original template layer.
White Rectangle 1
Add noise Uniform/45/Monochrome Checked sharpen and add drop shadow.
White Rectangle 2
Add noise Uniform/45/Monochrome Checked sharpen and add drop shadow.
Pink rectangle 1
Select all/float/defloat new raster layer, flood fill with #50b6ab into selection, select none & delete original template layer.
Pink rectangle 2
Select all/float/defloat new raster layer, flood fill with #50b6ab into selection, select none & delete original template layer.
Twirl
Select all/float/defloat new raster layer open paper 12 copy & paste into selection, selection invert, delete, select none & delete original template layer.
Twirl blur
Select all/float/defloat new raster layer, flood fill with #50b6ab into selection, select none & duplicate this layer, delete original template layer.
Merge raster 11 and the copy. Take your pick tool and slightly stretch raster 11 to give it a bigger gradient glow look.
Don't forget to add your drop shadow to each layer as you go.
Add your tube, resize 90 percent.
Time to add the elements, I used the following:
Element 64
Element 18 resize to 45 percent, duplicate & mirror
Element 143 resize to 45 percent, duplicate & mirror
Element 8 resize to 20 percent
See my tag for details.
Add more elements if you wish to.
Open new raster layer and send to the bottom, flood fill with #4baba1 and apply your mask.
Duplicate & mirror then merge down, duplicate & flip.
When your happy with your tag merge all layers and resize to your liking.
Apply the correct artist copyright and license info and save as a PNG, then add your name and merge & save.
I hope you enjoyed this tut. ♥
~ ~ ~ ~ ~ ~ ~ ~ ~ ~ ~ ~
My dear sweet friend sandy from ACDiva forum has tried my tut. Yay
This is her beautiful tag. Thanks so very much sandy!! ♥

Subscribe to:
Posts
(Atom)
Copyright Compliant Award

♥Blogs I Love


♥Stores I Love