Blinkies


Email Me
ladyaries_67@yahoo.com


Creative Teams
♥Proud Personal CT♥


Forums


I Support...

Sunday, September 15, 2013
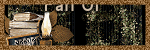
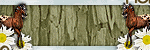
Come Hallows Eve - FTU

*Click tag to see full size*
This tutorial is from my own imagination,
any similarity to any other tag or tutorial is purely coincidental.
This tutorial was written by LadyAries on September 15th, 2013.
This tut was written for those with a basic knowledge of psp.
*Supplies Needed*
PSP: I am using X2 but any of them should work.
Font of choice, I am using AkaDora
Mask: WSL 84 HERE.
Drop Shadow usually V3 H3 O25 B5 black
*Tube of Choice*
I am using the lovely art of Eugene Rzhevskii.
This tube is however a exclusive and is only available in the Exclusive Club HERE.
This is a PTU tube and you must have a license to use.
*Scrap kit Of Choice*
I am using the fantastic PTU kit "Halloween Magic" by HorsePlay's Pasture.
~Updated Sept. 7th, 2014 this PTU kit is now FTU HERE
*PlugIns*
Eye Candy 6, Gradient glow for the name
~ ~ ~ ~ ~ ~ ~ ~ ~ ~
*Let's Get Started*
*Remember to add your drop shadow as you go along*
Open a new image 650 x 650
Element 66 resize 95 percent, copy and paste to your blank image.
Element 66 once again and copy and paste to your tag, this will give you a nice looking double frame to work with.
Activate your magic wand and click inside the frame of raster layer 2, selections, modify, expand by 8. Open a new raster layer, copy & paste paper 8, selections, invert, delete, selections none.
Element 21 resize 50 percent, copy & paste to the left side of your frame.
Copy & paste element 17 into the center of raster 2.
Element 75 resize 30 percent, copy & paste to the upper left corner of the web.
Add your tube & resize 90 percent, place in the center of your frames.
Take your eraser tool and erase the parts of the tube sticking out from the frame.
Element 50 resize 70 percent, copy & paste to the top of your frame.
Element 36 resize 35 percent, copy & paste to the top of your frame.
Element 21 resize 50 percent, copy & paste to the right side behind your frame.
Element 8 resize 25 percent, copy & paste to the bottom of your frame, duplicate & mirror.
Element 10 resize 28 percent, copy & paste to the bottom of your frame.
See my tag for details.
Add more elements if you wish to.
Open new raster layer and send to the bottom, flood fill with color of choice and apply your mask. Duplicate & mirror then merge down, duplicate & flip.
When you are happy with your tag merge all layers and resize to your liking.
Apply the correct artist copyright and license info and save as a PNG, then add your name and merge & save.
I hope you enjoyed this tut. ♥
Subscribe to:
Post Comments
(Atom)
Copyright Compliant Award

♥Blogs I Love


♥Stores I Love


0 comments:
Post a Comment